28 results (0,15412 seconds)

Brand

Merchant

Price (EUR)

Reset filter

Products
From
Shops

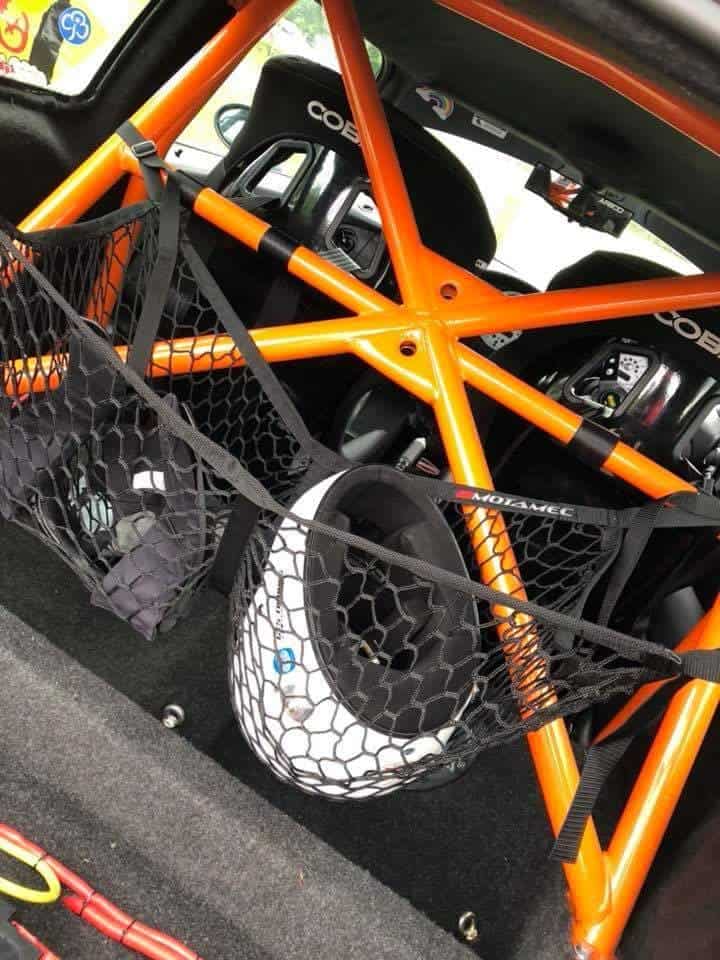
Mini R56 Half Cage (Colour: Specific RAL, Material: Standard CDS)

Mini R56 Half Cage (Colour: Specific Metallic RAL, Material: Standard CDS)

Mini R56 Half Cage (Colour: Specific Metallic RAL, Material: LIGHTWEIGHT BS4-T45 - Unapproved for competition)

Mini R56 Half Cage (Colour: Unpainted, Material: LIGHTWEIGHT BS4-T45 - Unapproved for competition)

Mini R56 Half Cage (Material: Standard CDS)

Mini R56 Half Cage (Colour: Unpainted, Material: Standard CDS)

Mini R56 Half Cage (Material: LIGHTWEIGHT BS4-T45 - Unapproved for competition)

Mini R56 Half Cage (Colour: Specific RAL, Material: LIGHTWEIGHT BS4-T45 - Unapproved for competition)

Mini R50 / R53 Half Roll Cage (Colour: Unpainted, Material: LIGHTWEIGHT BS4-T45 - Unapproved for competition)

Mini R50 / R53 Half Roll Cage (Material: LIGHTWEIGHT BS4-T45 - Unapproved for competition)

Mini R50 / R53 Half Roll Cage (Colour: Unpainted, Material: Standard CDS)

Mini R50 / R53 Half Roll Cage (Colour: Specific RAL, Material: Standard CDS)

Mini R50 / R53 Half Roll Cage (Colour: Specific Metallic RAL, Material: Standard CDS)

Mini R50 / R53 Half Roll Cage (Colour: Specific RAL, Material: LIGHTWEIGHT BS4-T45 - Unapproved for competition)

Mini R50 / R53 Half Roll Cage (Colour: Specific Metallic RAL, Material: LIGHTWEIGHT BS4-T45 - Unapproved for competition)

Mini R50 / R53 Half Roll Cage (Material: Standard CDS)

MK2 Triumph Spitfire Weld in Roll Cage kit (Material: Standard CDS, Fitting: Yes)

MK2 Triumph Spitfire Weld in Roll Cage kit (Material: Standard CDS, Fitting: Yes)

THIS IS A JOB FOR COMPETENT FABRICATORS ONLY! FITTING AVAILABLE Whats included? MRB – MAIN ROLL BAR LAB/RAB – LEFT/RIGHT A BARS (LATERAL ROLLBARS) RFB – ROOFBAR RB/LB – RIGHT/LEFT BACKSTAY (REAR LEGS) D1 – MAIN DIAGONALS (D1 TOP ALLWAYS GOES OVER DRIVERS HEAD) HB – HARNESS BAR LD/RD – LEFT/RIGHT DOORBARS LBP/RBP – LEFT/RIGHT B PILLAR DIAGONALS (HEAD HEIGHT CORNER BRACES BEHIND DRIVER AND PASSENGER HEAD) MOUNTS AND FOOT PLATES NOTE. SOME FETTLING MAY BE REQUIRED & ALL TUBES/ PLATES MUST BE CLEANED AND PREPPED READY FOR WELDING PRIOR TO ASSEMBLY. -This kit is Designed for easy assembly for anyone with welding and fabrication abilities.   -The Kit is CNC notched, marked and labelled.   -Look at the images below for reference as to where the mounts sit, use this to gauge where to remove unused body components from, give your self a good size area to work with, then clean all the paint from the chassis in the areas of mounting, this will save lots of time.   -Using the images for reference position the hoop mounts in the car (may require some fettling to get a snug fit for welding)   -Your mounts can be tacked straight down to build up from.   -Now position the main roll bar (MRB) on the mount. Tack the bottom allowing movement to set the lean angle.   offer the LAB and LD to gauge the position of landing for the foot of LAB, mark this and then tack your front mount below it, measure the position and copy it on the drivers side (some trimming may be required for floor shape)   Now the front mounts are tacked in fit the front A bars (LAB/RAB) and the doorbars to ensure correct positioning. (ensure the A pillar is parallel to the tube and looks a nice fitment)   once this is secure fit RFB and tack in place.   once you have all roof components and doorbars in place you can weld around all visible joins. DO NOT WELD TUBES TO THE MOUNTS!   now the front is welded you can squeeze the cage together with a strap to give access to the joins between the body.   once the cage is fully welded you can remove the strap and push the legs back where they belong and fully weld them in place.   with the front of the cage fully welded and in position you can now build up the rest of the cage.   for the rear backstays, use the images for reference, the diagonals will help you set the correct width and the length of the bars will tell you where to land on the arch/strut. You will need to trim a small amount off the body where the backstay touches to allow the legs to land properly on the mount   the width between the 2 rear stay feet should be 1020mm centres   Offer your rear legs up to the positioning marks (RB and LB), tack them in place, then fit the any diagonal as required.   all additional bars can be located using the positioning marks and some element of common sense.   ensure everything is fully welded,  clean all the spatter and shes done!

GBP 1440.00
1

MK2 Triumph Spitfire Weld in Roll Cage kit (Material: LIGHTWEIGHT BS4-T45 - Unapproved for competition, Fitting: No)

MK2 Triumph Spitfire Weld in Roll Cage kit (Material: LIGHTWEIGHT BS4-T45 - Unapproved for competition, Fitting: No)

THIS IS A JOB FOR COMPETENT FABRICATORS ONLY! FITTING AVAILABLE Whats included? MRB – MAIN ROLL BAR LAB/RAB – LEFT/RIGHT A BARS (LATERAL ROLLBARS) RFB – ROOFBAR RB/LB – RIGHT/LEFT BACKSTAY (REAR LEGS) D1 – MAIN DIAGONALS (D1 TOP ALLWAYS GOES OVER DRIVERS HEAD) HB – HARNESS BAR LD/RD – LEFT/RIGHT DOORBARS LBP/RBP – LEFT/RIGHT B PILLAR DIAGONALS (HEAD HEIGHT CORNER BRACES BEHIND DRIVER AND PASSENGER HEAD) MOUNTS AND FOOT PLATES NOTE. SOME FETTLING MAY BE REQUIRED & ALL TUBES/ PLATES MUST BE CLEANED AND PREPPED READY FOR WELDING PRIOR TO ASSEMBLY. -This kit is Designed for easy assembly for anyone with welding and fabrication abilities.   -The Kit is CNC notched, marked and labelled.   -Look at the images below for reference as to where the mounts sit, use this to gauge where to remove unused body components from, give your self a good size area to work with, then clean all the paint from the chassis in the areas of mounting, this will save lots of time.   -Using the images for reference position the hoop mounts in the car (may require some fettling to get a snug fit for welding)   -Your mounts can be tacked straight down to build up from.   -Now position the main roll bar (MRB) on the mount. Tack the bottom allowing movement to set the lean angle.   offer the LAB and LD to gauge the position of landing for the foot of LAB, mark this and then tack your front mount below it, measure the position and copy it on the drivers side (some trimming may be required for floor shape)   Now the front mounts are tacked in fit the front A bars (LAB/RAB) and the doorbars to ensure correct positioning. (ensure the A pillar is parallel to the tube and looks a nice fitment)   once this is secure fit RFB and tack in place.   once you have all roof components and doorbars in place you can weld around all visible joins. DO NOT WELD TUBES TO THE MOUNTS!   now the front is welded you can squeeze the cage together with a strap to give access to the joins between the body.   once the cage is fully welded you can remove the strap and push the legs back where they belong and fully weld them in place.   with the front of the cage fully welded and in position you can now build up the rest of the cage.   for the rear backstays, use the images for reference, the diagonals will help you set the correct width and the length of the bars will tell you where to land on the arch/strut. You will need to trim a small amount off the body where the backstay touches to allow the legs to land properly on the mount   the width between the 2 rear stay feet should be 1020mm centres   Offer your rear legs up to the positioning marks (RB and LB), tack them in place, then fit the any diagonal as required.   all additional bars can be located using the positioning marks and some element of common sense.   ensure everything is fully welded,  clean all the spatter and shes done!

GBP 990.00
1

MK2 Triumph Spitfire Weld in Roll Cage kit (Material: Standard CDS, Fitting: No)

MK2 Triumph Spitfire Weld in Roll Cage kit (Material: Standard CDS, Fitting: No)

THIS IS A JOB FOR COMPETENT FABRICATORS ONLY! FITTING AVAILABLE Whats included? MRB – MAIN ROLL BAR LAB/RAB – LEFT/RIGHT A BARS (LATERAL ROLLBARS) RFB – ROOFBAR RB/LB – RIGHT/LEFT BACKSTAY (REAR LEGS) D1 – MAIN DIAGONALS (D1 TOP ALLWAYS GOES OVER DRIVERS HEAD) HB – HARNESS BAR LD/RD – LEFT/RIGHT DOORBARS LBP/RBP – LEFT/RIGHT B PILLAR DIAGONALS (HEAD HEIGHT CORNER BRACES BEHIND DRIVER AND PASSENGER HEAD) MOUNTS AND FOOT PLATES NOTE. SOME FETTLING MAY BE REQUIRED & ALL TUBES/ PLATES MUST BE CLEANED AND PREPPED READY FOR WELDING PRIOR TO ASSEMBLY. -This kit is Designed for easy assembly for anyone with welding and fabrication abilities.   -The Kit is CNC notched, marked and labelled.   -Look at the images below for reference as to where the mounts sit, use this to gauge where to remove unused body components from, give your self a good size area to work with, then clean all the paint from the chassis in the areas of mounting, this will save lots of time.   -Using the images for reference position the hoop mounts in the car (may require some fettling to get a snug fit for welding)   -Your mounts can be tacked straight down to build up from.   -Now position the main roll bar (MRB) on the mount. Tack the bottom allowing movement to set the lean angle.   offer the LAB and LD to gauge the position of landing for the foot of LAB, mark this and then tack your front mount below it, measure the position and copy it on the drivers side (some trimming may be required for floor shape)   Now the front mounts are tacked in fit the front A bars (LAB/RAB) and the doorbars to ensure correct positioning. (ensure the A pillar is parallel to the tube and looks a nice fitment)   once this is secure fit RFB and tack in place.   once you have all roof components and doorbars in place you can weld around all visible joins. DO NOT WELD TUBES TO THE MOUNTS!   now the front is welded you can squeeze the cage together with a strap to give access to the joins between the body.   once the cage is fully welded you can remove the strap and push the legs back where they belong and fully weld them in place.   with the front of the cage fully welded and in position you can now build up the rest of the cage.   for the rear backstays, use the images for reference, the diagonals will help you set the correct width and the length of the bars will tell you where to land on the arch/strut. You will need to trim a small amount off the body where the backstay touches to allow the legs to land properly on the mount   the width between the 2 rear stay feet should be 1020mm centres   Offer your rear legs up to the positioning marks (RB and LB), tack them in place, then fit the any diagonal as required.   all additional bars can be located using the positioning marks and some element of common sense.   ensure everything is fully welded,  clean all the spatter and shes done!

GBP 660.00
1

MK2 Triumph Spitfire Weld in Roll Cage kit (Material: LIGHTWEIGHT BS4-T45 - Unapproved for competition, Fitting: Yes)

MK2 Triumph Spitfire Weld in Roll Cage kit (Material: LIGHTWEIGHT BS4-T45 - Unapproved for competition, Fitting: Yes)

THIS IS A JOB FOR COMPETENT FABRICATORS ONLY! FITTING AVAILABLE Whats included? MRB – MAIN ROLL BAR LAB/RAB – LEFT/RIGHT A BARS (LATERAL ROLLBARS) RFB – ROOFBAR RB/LB – RIGHT/LEFT BACKSTAY (REAR LEGS) D1 – MAIN DIAGONALS (D1 TOP ALLWAYS GOES OVER DRIVERS HEAD) HB – HARNESS BAR LD/RD – LEFT/RIGHT DOORBARS LBP/RBP – LEFT/RIGHT B PILLAR DIAGONALS (HEAD HEIGHT CORNER BRACES BEHIND DRIVER AND PASSENGER HEAD) MOUNTS AND FOOT PLATES NOTE. SOME FETTLING MAY BE REQUIRED & ALL TUBES/ PLATES MUST BE CLEANED AND PREPPED READY FOR WELDING PRIOR TO ASSEMBLY. -This kit is Designed for easy assembly for anyone with welding and fabrication abilities.   -The Kit is CNC notched, marked and labelled.   -Look at the images below for reference as to where the mounts sit, use this to gauge where to remove unused body components from, give your self a good size area to work with, then clean all the paint from the chassis in the areas of mounting, this will save lots of time.   -Using the images for reference position the hoop mounts in the car (may require some fettling to get a snug fit for welding)   -Your mounts can be tacked straight down to build up from.   -Now position the main roll bar (MRB) on the mount. Tack the bottom allowing movement to set the lean angle.   offer the LAB and LD to gauge the position of landing for the foot of LAB, mark this and then tack your front mount below it, measure the position and copy it on the drivers side (some trimming may be required for floor shape)   Now the front mounts are tacked in fit the front A bars (LAB/RAB) and the doorbars to ensure correct positioning. (ensure the A pillar is parallel to the tube and looks a nice fitment)   once this is secure fit RFB and tack in place.   once you have all roof components and doorbars in place you can weld around all visible joins. DO NOT WELD TUBES TO THE MOUNTS!   now the front is welded you can squeeze the cage together with a strap to give access to the joins between the body.   once the cage is fully welded you can remove the strap and push the legs back where they belong and fully weld them in place.   with the front of the cage fully welded and in position you can now build up the rest of the cage.   for the rear backstays, use the images for reference, the diagonals will help you set the correct width and the length of the bars will tell you where to land on the arch/strut. You will need to trim a small amount off the body where the backstay touches to allow the legs to land properly on the mount   the width between the 2 rear stay feet should be 1020mm centres   Offer your rear legs up to the positioning marks (RB and LB), tack them in place, then fit the any diagonal as required.   all additional bars can be located using the positioning marks and some element of common sense.   ensure everything is fully welded,  clean all the spatter and shes done!

GBP 1890.00
1

Volvo 850 Weld-In Roll Cage Kit – DIY Motorsport Cage (Material: Standard CDS, Fitting: Yes)

Volvo 850 Weld-In Roll Cage Kit – DIY Motorsport Cage (Material: Standard CDS, Fitting: Yes)

🔧 Volvo 850 DIY Weld-In Roll Cage Kit – Built for Motorsport & Track Enthusiasts! Upgrade your Volvo 850 with our DIY Weld-In Roll Cage Kit, designed for motorsport, track day enthusiasts, and performance builds. This high-strength, precision-engineered kit reinforces chassis rigidity, enhances driver safety, and provides the structural integrity required for serious track use. 🔴 IMPORTANT: This is a weld-in kit for competent fabricators only. Advanced welding and fabrication skills are required. If you need professional installation, contact us for recommendations. 🏆 Key Features of the Volvo 850 Weld-In Roll Cage Kit ✔ Motorsport-Grade Safety – Designed for track day, rally, and performance applications ✔ Precision CNC-Notched Tubing – Ensures seamless fitment and easy assembly ✔ Fully Labeled Components – Pre-marked tubes simplify the installation process ✔ Heavy-Duty Construction – Reinforces the chassis for improved crash protection ✔ Compliant with Motorsport Regulations – Built to meet MSUK Blue Book Regulations ✔ Mounting Plates & Footplates Included – For secure and reinforced installation 🔹 What’s Included in the Volvo 850 Weld-In Roll Cage Kit? This complete weld-in kit includes all necessary bars, gussets, and mounting components for a track-ready installation. 📌 Structural Components: ✔ Main Roll Bar (MRB) – Provides core structural support ✔ A-Pillar Bars (LAB/RAB) – Reinforces the front chassis ✔ Front Roof Bar (RFB) – Adds overhead protection ✔ Rear Stays (RB/LB) – Strengthens chassis rigidity ✔ Left/Right Harness Bars (LH/RH) – Securely mounts harnesses 📌 Bracing & Diagonals: ✔ Centre Diagonals (CD1, CD2, CD3) – Additional chassis reinforcement ✔ Roof Diagonals (RD1, RD2, RD3) – Provides structural stability 📌 Door Bars & Supports: ✔ Upper Door Bars (LUD/RUD) – Strengthens side impact protection ✔ Lower Door Bars (LLD/RLD) – Additional door impact resistance ✔ A-Pillar Supports (RAPS/LAPS) – Further enhances safety 📌 Additional Gussets & Mounting: ✔ Centre X Gussets – Improves rigidity at key stress points ✔ Door Bar Gussets – Reinforces door bar intersections ✔ Roof X Gussets – Increases roof strength ✔ 40mm A-Pillar Gussets – Improves front chassis connection ✔ Mounting Plates & Footplates – Provides strong, secure mounting 💡 Note: Some minor fettling may be required. All tubes and plates must be cleaned and prepped before welding. 🔹 Step-by-Step Installation Guide This kit is designed for easy assembly by experienced fabricators. Follow these steps for a secure and professional installation: 🔧 Preparation: 1️⃣ Review images for reference on mount positioning 2️⃣ Remove unused body components for clearance 3️⃣ Clean paint from the chassis in all mounting areas 🔧 Mounting the Main Roll Bar & Front Section: 4️⃣ Drill a 45-50mm hole under each mount for the main hoop legs to drop into the chassis rail 5️⃣ Tack weld the mounting plates in place 6️⃣ Position the Main Roll Bar (MRB) and tack weld the base 7️⃣ Fit and tack weld the A-Bars (LAB/RAB) & Lower Door Bars (LLD/RLD) 8️⃣ Secure the Front Roof Bar (RFB) and door bars to confirm proper alignment 🔧 Roof & Rear Assembly: 9️⃣ Install and tack weld the Roof Diagonals & Centre X Bracing 🔟 Align the Rear Stays (RB/LB) using the positioning marks, then tack them in place 1️⃣1️⃣ Fit and tack weld all remaining components 🔧 Final Welding & Completion: 1️⃣2️⃣ Weld all visible joints, but do not weld the mounts or feet yet 1️⃣3️⃣ Break the mounts off the body and remove the cage 1️⃣4️⃣ Fully weld all hidden joints for maximum strength 1️⃣5️⃣ Reinstall the cage, secure the mounts, and weld all final connections 💡 Pr

GBP 2400.00
1

Volvo 850 Weld-In Roll Cage Kit – DIY Motorsport Cage (Material: LIGHTWEIGHT BS4-T45 - Unapproved for competition, Fitting: No)

Volvo 850 Weld-In Roll Cage Kit – DIY Motorsport Cage (Material: LIGHTWEIGHT BS4-T45 - Unapproved for competition, Fitting: No)

🔧 Volvo 850 DIY Weld-In Roll Cage Kit – Built for Motorsport & Track Enthusiasts! Upgrade your Volvo 850 with our DIY Weld-In Roll Cage Kit, designed for motorsport, track day enthusiasts, and performance builds. This high-strength, precision-engineered kit reinforces chassis rigidity, enhances driver safety, and provides the structural integrity required for serious track use. 🔴 IMPORTANT: This is a weld-in kit for competent fabricators only. Advanced welding and fabrication skills are required. If you need professional installation, contact us for recommendations. 🏆 Key Features of the Volvo 850 Weld-In Roll Cage Kit ✔ Motorsport-Grade Safety – Designed for track day, rally, and performance applications ✔ Precision CNC-Notched Tubing – Ensures seamless fitment and easy assembly ✔ Fully Labeled Components – Pre-marked tubes simplify the installation process ✔ Heavy-Duty Construction – Reinforces the chassis for improved crash protection ✔ Compliant with Motorsport Regulations – Built to meet MSUK Blue Book Regulations ✔ Mounting Plates & Footplates Included – For secure and reinforced installation 🔹 What’s Included in the Volvo 850 Weld-In Roll Cage Kit? This complete weld-in kit includes all necessary bars, gussets, and mounting components for a track-ready installation. 📌 Structural Components: ✔ Main Roll Bar (MRB) – Provides core structural support ✔ A-Pillar Bars (LAB/RAB) – Reinforces the front chassis ✔ Front Roof Bar (RFB) – Adds overhead protection ✔ Rear Stays (RB/LB) – Strengthens chassis rigidity ✔ Left/Right Harness Bars (LH/RH) – Securely mounts harnesses 📌 Bracing & Diagonals: ✔ Centre Diagonals (CD1, CD2, CD3) – Additional chassis reinforcement ✔ Roof Diagonals (RD1, RD2, RD3) – Provides structural stability 📌 Door Bars & Supports: ✔ Upper Door Bars (LUD/RUD) – Strengthens side impact protection ✔ Lower Door Bars (LLD/RLD) – Additional door impact resistance ✔ A-Pillar Supports (RAPS/LAPS) – Further enhances safety 📌 Additional Gussets & Mounting: ✔ Centre X Gussets – Improves rigidity at key stress points ✔ Door Bar Gussets – Reinforces door bar intersections ✔ Roof X Gussets – Increases roof strength ✔ 40mm A-Pillar Gussets – Improves front chassis connection ✔ Mounting Plates & Footplates – Provides strong, secure mounting 💡 Note: Some minor fettling may be required. All tubes and plates must be cleaned and prepped before welding. 🔹 Step-by-Step Installation Guide This kit is designed for easy assembly by experienced fabricators. Follow these steps for a secure and professional installation: 🔧 Preparation: 1️⃣ Review images for reference on mount positioning 2️⃣ Remove unused body components for clearance 3️⃣ Clean paint from the chassis in all mounting areas 🔧 Mounting the Main Roll Bar & Front Section: 4️⃣ Drill a 45-50mm hole under each mount for the main hoop legs to drop into the chassis rail 5️⃣ Tack weld the mounting plates in place 6️⃣ Position the Main Roll Bar (MRB) and tack weld the base 7️⃣ Fit and tack weld the A-Bars (LAB/RAB) & Lower Door Bars (LLD/RLD) 8️⃣ Secure the Front Roof Bar (RFB) and door bars to confirm proper alignment 🔧 Roof & Rear Assembly: 9️⃣ Install and tack weld the Roof Diagonals & Centre X Bracing 🔟 Align the Rear Stays (RB/LB) using the positioning marks, then tack them in place 1️⃣1️⃣ Fit and tack weld all remaining components 🔧 Final Welding & Completion: 1️⃣2️⃣ Weld all visible joints, but do not weld the mounts or feet yet 1️⃣3️⃣ Break the mounts off the body and remove the cage 1️⃣4️⃣ Fully weld all hidden joints for maximum strength 1️⃣5️⃣ Reinstall the cage, secure the mounts, and weld all final connections 💡 Pr

GBP 1575.60
1

Volvo 850 Weld-In Roll Cage Kit – DIY Motorsport Cage (Material: Standard CDS, Fitting: No)

Volvo 850 Weld-In Roll Cage Kit – DIY Motorsport Cage (Material: Standard CDS, Fitting: No)

🔧 Volvo 850 DIY Weld-In Roll Cage Kit – Built for Motorsport & Track Enthusiasts! Upgrade your Volvo 850 with our DIY Weld-In Roll Cage Kit, designed for motorsport, track day enthusiasts, and performance builds. This high-strength, precision-engineered kit reinforces chassis rigidity, enhances driver safety, and provides the structural integrity required for serious track use. 🔴 IMPORTANT: This is a weld-in kit for competent fabricators only. Advanced welding and fabrication skills are required. If you need professional installation, contact us for recommendations. 🏆 Key Features of the Volvo 850 Weld-In Roll Cage Kit ✔ Motorsport-Grade Safety – Designed for track day, rally, and performance applications ✔ Precision CNC-Notched Tubing – Ensures seamless fitment and easy assembly ✔ Fully Labeled Components – Pre-marked tubes simplify the installation process ✔ Heavy-Duty Construction – Reinforces the chassis for improved crash protection ✔ Compliant with Motorsport Regulations – Built to meet MSUK Blue Book Regulations ✔ Mounting Plates & Footplates Included – For secure and reinforced installation 🔹 What’s Included in the Volvo 850 Weld-In Roll Cage Kit? This complete weld-in kit includes all necessary bars, gussets, and mounting components for a track-ready installation. 📌 Structural Components: ✔ Main Roll Bar (MRB) – Provides core structural support ✔ A-Pillar Bars (LAB/RAB) – Reinforces the front chassis ✔ Front Roof Bar (RFB) – Adds overhead protection ✔ Rear Stays (RB/LB) – Strengthens chassis rigidity ✔ Left/Right Harness Bars (LH/RH) – Securely mounts harnesses 📌 Bracing & Diagonals: ✔ Centre Diagonals (CD1, CD2, CD3) – Additional chassis reinforcement ✔ Roof Diagonals (RD1, RD2, RD3) – Provides structural stability 📌 Door Bars & Supports: ✔ Upper Door Bars (LUD/RUD) – Strengthens side impact protection ✔ Lower Door Bars (LLD/RLD) – Additional door impact resistance ✔ A-Pillar Supports (RAPS/LAPS) – Further enhances safety 📌 Additional Gussets & Mounting: ✔ Centre X Gussets – Improves rigidity at key stress points ✔ Door Bar Gussets – Reinforces door bar intersections ✔ Roof X Gussets – Increases roof strength ✔ 40mm A-Pillar Gussets – Improves front chassis connection ✔ Mounting Plates & Footplates – Provides strong, secure mounting 💡 Note: Some minor fettling may be required. All tubes and plates must be cleaned and prepped before welding. 🔹 Step-by-Step Installation Guide This kit is designed for easy assembly by experienced fabricators. Follow these steps for a secure and professional installation: 🔧 Preparation: 1️⃣ Review images for reference on mount positioning 2️⃣ Remove unused body components for clearance 3️⃣ Clean paint from the chassis in all mounting areas 🔧 Mounting the Main Roll Bar & Front Section: 4️⃣ Drill a 45-50mm hole under each mount for the main hoop legs to drop into the chassis rail 5️⃣ Tack weld the mounting plates in place 6️⃣ Position the Main Roll Bar (MRB) and tack weld the base 7️⃣ Fit and tack weld the A-Bars (LAB/RAB) & Lower Door Bars (LLD/RLD) 8️⃣ Secure the Front Roof Bar (RFB) and door bars to confirm proper alignment 🔧 Roof & Rear Assembly: 9️⃣ Install and tack weld the Roof Diagonals & Centre X Bracing 🔟 Align the Rear Stays (RB/LB) using the positioning marks, then tack them in place 1️⃣1️⃣ Fit and tack weld all remaining components 🔧 Final Welding & Completion: 1️⃣2️⃣ Weld all visible joints, but do not weld the mounts or feet yet 1️⃣3️⃣ Break the mounts off the body and remove the cage 1️⃣4️⃣ Fully weld all hidden joints for maximum strength 1️⃣5️⃣ Reinstall the cage, secure the mounts, and weld all final connections 💡 Pr

GBP 1050.00
1

Volvo 850 Weld-In Roll Cage Kit – DIY Motorsport Cage (Material: LIGHTWEIGHT BS4-T45 - Unapproved for competition, Fitting: Yes)

Volvo 850 Weld-In Roll Cage Kit – DIY Motorsport Cage (Material: LIGHTWEIGHT BS4-T45 - Unapproved for competition, Fitting: Yes)

🔧 Volvo 850 DIY Weld-In Roll Cage Kit – Built for Motorsport & Track Enthusiasts! Upgrade your Volvo 850 with our DIY Weld-In Roll Cage Kit, designed for motorsport, track day enthusiasts, and performance builds. This high-strength, precision-engineered kit reinforces chassis rigidity, enhances driver safety, and provides the structural integrity required for serious track use. 🔴 IMPORTANT: This is a weld-in kit for competent fabricators only. Advanced welding and fabrication skills are required. If you need professional installation, contact us for recommendations. 🏆 Key Features of the Volvo 850 Weld-In Roll Cage Kit ✔ Motorsport-Grade Safety – Designed for track day, rally, and performance applications ✔ Precision CNC-Notched Tubing – Ensures seamless fitment and easy assembly ✔ Fully Labeled Components – Pre-marked tubes simplify the installation process ✔ Heavy-Duty Construction – Reinforces the chassis for improved crash protection ✔ Compliant with Motorsport Regulations – Built to meet MSUK Blue Book Regulations ✔ Mounting Plates & Footplates Included – For secure and reinforced installation 🔹 What’s Included in the Volvo 850 Weld-In Roll Cage Kit? This complete weld-in kit includes all necessary bars, gussets, and mounting components for a track-ready installation. 📌 Structural Components: ✔ Main Roll Bar (MRB) – Provides core structural support ✔ A-Pillar Bars (LAB/RAB) – Reinforces the front chassis ✔ Front Roof Bar (RFB) – Adds overhead protection ✔ Rear Stays (RB/LB) – Strengthens chassis rigidity ✔ Left/Right Harness Bars (LH/RH) – Securely mounts harnesses 📌 Bracing & Diagonals: ✔ Centre Diagonals (CD1, CD2, CD3) – Additional chassis reinforcement ✔ Roof Diagonals (RD1, RD2, RD3) – Provides structural stability 📌 Door Bars & Supports: ✔ Upper Door Bars (LUD/RUD) – Strengthens side impact protection ✔ Lower Door Bars (LLD/RLD) – Additional door impact resistance ✔ A-Pillar Supports (RAPS/LAPS) – Further enhances safety 📌 Additional Gussets & Mounting: ✔ Centre X Gussets – Improves rigidity at key stress points ✔ Door Bar Gussets – Reinforces door bar intersections ✔ Roof X Gussets – Increases roof strength ✔ 40mm A-Pillar Gussets – Improves front chassis connection ✔ Mounting Plates & Footplates – Provides strong, secure mounting 💡 Note: Some minor fettling may be required. All tubes and plates must be cleaned and prepped before welding. 🔹 Step-by-Step Installation Guide This kit is designed for easy assembly by experienced fabricators. Follow these steps for a secure and professional installation: 🔧 Preparation: 1️⃣ Review images for reference on mount positioning 2️⃣ Remove unused body components for clearance 3️⃣ Clean paint from the chassis in all mounting areas 🔧 Mounting the Main Roll Bar & Front Section: 4️⃣ Drill a 45-50mm hole under each mount for the main hoop legs to drop into the chassis rail 5️⃣ Tack weld the mounting plates in place 6️⃣ Position the Main Roll Bar (MRB) and tack weld the base 7️⃣ Fit and tack weld the A-Bars (LAB/RAB) & Lower Door Bars (LLD/RLD) 8️⃣ Secure the Front Roof Bar (RFB) and door bars to confirm proper alignment 🔧 Roof & Rear Assembly: 9️⃣ Install and tack weld the Roof Diagonals & Centre X Bracing 🔟 Align the Rear Stays (RB/LB) using the positioning marks, then tack them in place 1️⃣1️⃣ Fit and tack weld all remaining components 🔧 Final Welding & Completion: 1️⃣2️⃣ Weld all visible joints, but do not weld the mounts or feet yet 1️⃣3️⃣ Break the mounts off the body and remove the cage 1️⃣4️⃣ Fully weld all hidden joints for maximum strength 1️⃣5️⃣ Reinstall the cage, secure the mounts, and weld all final connections 💡 Pr

GBP 3360.00
1

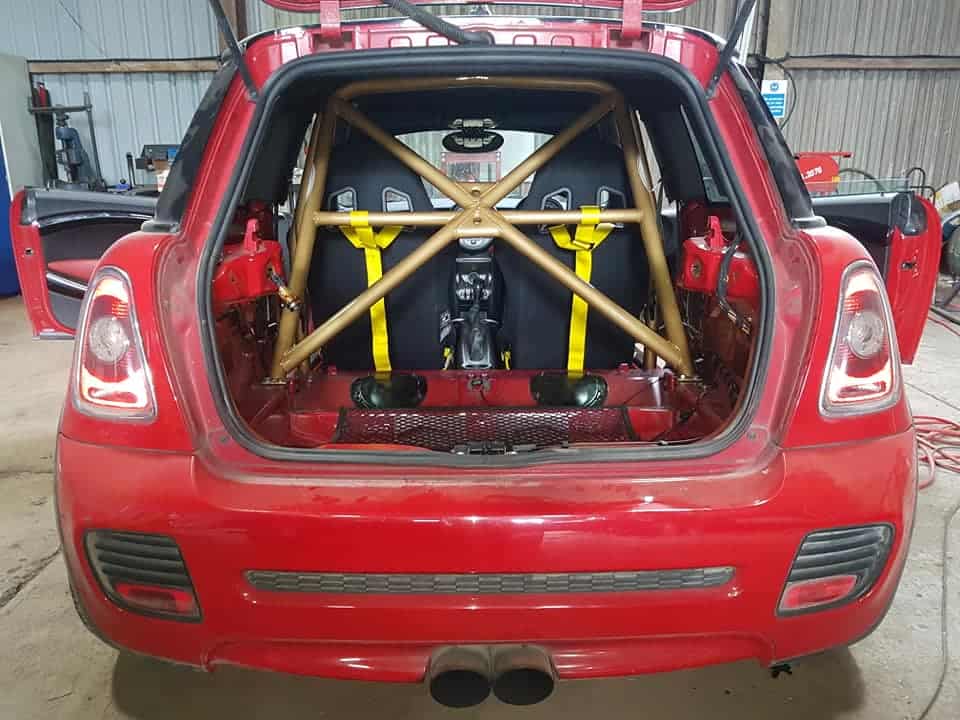
Mercedes 190E Weld in Roll Cage kit (Material: Standard CDS, Fitting: No)

Mercedes 190E Weld in Roll Cage kit (Material: Standard CDS, Fitting: No)

THIS IS A JOB FOR COMPETENT FABRICATORS ONLY! FITTING AVAILABLE Whats included? MRB – MAIN ROLL BAR LAB/RAB – LEFT/RIGHT A BARS (LATERAL ROLLBARS) RFB – ROOFBAR RB/LB – RIGHT/LEFT BACKSTAY (REAR LEGS) D1,D2 &D3 – MAIN DIAGONALS (D1 TOP ALLWAYS GOES OVER DRIVERS HEAD) LH/RH – LEFT/RIGHT HARNESS BAR CD1,CD2 &CD3 – CENTRE DIAGONALS ( D1 TOP ALLWAYS GOES OVER DRIVERS HEAD) LUD/RUD – LEFT/RIGHT UPPER DOORBARS LLD/RLD – LEFT RIGHT LOWER DOORBARS RAPS/LAPS – LEFT/RIGHT A PILLAR SUPPORTS (PIT PROPS) RLAPS/LLAPS – LEFT RIGHT LOWER A PILLAR SUPPORTS (SMALL PEICE BETWEEN UPPER AND LOWER DOORBAR) LBP/RBP – LEFT/RIGHT B PILLAR DIAGONALS (HEAD HEIGHT CORNER BRACES BEHIND DRIVER AND PASSENGER HEAD) RD1,RD2 &RD3 – ROOF DIAGONALS (FRONT OF D1 ALWAYS DRIVERS SIDE) RRT/LRT – LEFT AND RIGHT REAR TRIANGULATION LFT/RFT – LEFT AND RIGHT FRONT TRIANGULATION WILL NEED SHAPING TO SUIT TURRETS) DB – DASH BAR CURVED CENTRE X GUSSETS DOORBAR GUSSETS 40MM A PILLAR GUSSETS  MOUNTS AND FOOT PLATES NOTE. SOME FETTLING MAY BE REQUIRED & ALL TUBES/ PLATES MUST BE CLEANED AND PREPPED READY FOR WELDING PRIOR TO ASSEMBLY. -This kit is Designed for easy assembly for anyone with welding and fabrication abilities.   -The Kit is CNC notched, marked and labelled.   -Look at the images below for reference as to where the mounts sit, use this to gauge where to remove unused body components from, give your self a good size area to work with, then clean all the paint from the chassis in the areas of mounting, this will save lots of time.   -For the main hoop mounts you need to neatly cut away part of the sheet metal as shown in the photos, this allows you to slide the mount in half and half, you can weld this to the mount once in place after the steps below.   -Your mounts can be tacked straight down to build up from.   -Now position the main roll bar (MRB) on the mount. Tack the bottom allowing movement to set the lean angle.   offer the LAB and LLD to gauge the position of landing for the foot of LAB, mark this and then tack your front mount below it, measure the position and copy it on the drivers side (some trimming may be required for floor shape)   Now the front mounts are tacked in fit the front A bars (LAB/RAB) and the doorbars to ensure correct positioning.   once this is secure fit all roof components and tack in place.   once you have all roof components and doorbars in place you can weld around all visible joins. DO NOT WELD ROUND THE MOUNTS OR FEET!   now you can break the mounts off the body and cage to remove, dropping the cage and allowing movement, you may need to ratchet strap the cage inwards to allow free movement to move the cage where needed to access all the hidden joins.   once the cage is fully welded you can lift the cage back up and re fit the mounts, ensuring to weld any joins before covering them up with the tube.   with the front of the cage fully welded and in position you can now build up the rest of the cage.   for the rear backstays, use the images for reference, the diagonals will help you set the correct width and the length of the bars will tell you where to land on the arch/strut.   Offer your rear legs up to the positioning marks (RB and LB), tack them in place, then fit the any diagonals as required.   all additional bars can be located using the positioning marks and some element of common sense.   ensure everything is fully welded, now fit any door bar gussets and pillar gussets, clean all the spatter and shes done!
GBP 1800.00
1